Saturday, February 21, 2009

La lanterne Bowden "Aurora"

The Aurora light arrived from France yesterday, NOS complete with box and brochure, and still in it's original wrapping (photos #4, #5, & #6 are from the seller's original listing). The first thing I learned is that I had the manufacturer wrong - the model name of the light is "Aurora", and it's manufactured by the French branch of the Bowden company, "Anciens Éstablissements Bowden" of Paris (XVIIe) France (note address at bottom of brochure, photo #28).

Introduced in 1948 (see Rebour illustration, image #1), the Aurora appears to have been a top-quality light using expensive materials and excellent finish. The dynamo is installed inside the headlight shell, making it nearly waterproof. And with the mounting bolt above the wheel, there was less risk of the light or dynamo falling into the spokes in an accicent or if the pivot bolt should come loose.

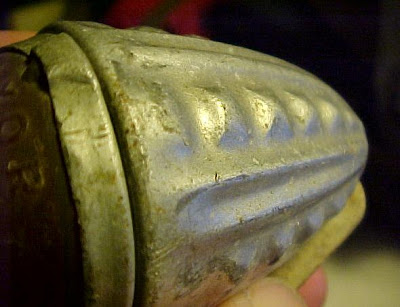
The headlight shell is chrome-plated brass, highly polished. The leading edge of the shell is rather rough, and there are marks where the shape was drawn down to form the smaller diameter for the front opening. The red rib at the top is tranluscent plastic, and the top fin is aluminum. I think the function of the fin is to act as finger tab when engaging or disengaging the drive assembly.

The cast zinc mount for the drive assembly is attached to the bottom of the shell by two bolts and nuts. At the back, the heavy stamped steel mounting arm is attacked with a nut and bolt. on the right side, looking from the front, the drive assembly arm is pinned to the mount, with a spring pushing it toward the "engaged" position. A lever pivots at the center of the mount... pull against the spring to disengage the drive, or push down to release the arm and engage the drive wheel.

The drive arm is cast aluminum. It includes the streamlined guard (looks like the wheel pants from a Stuka dive bomber!). There is a grease fitting for lubrification of the drive wheel bearing.

A chrome tube runs from above the drive wheel to the shell. Inside this tube is the drive cable (I haven't taken everything apart yet, so I'm not sure what this looks like). The tube is not anchored at the bottom, but free to move in or out of the drive arm when the drive is engaged/disengaged.

Inside the shell, the dynamo is uncovered and entirely visible. It is attached to the shell by a nut and hollow bolt where the drive cable enters.

The clear plastic lens, plated copper bezel, and silvered copper reflector are inseperable (see image #21). The bezel fits very closely in the shell opening, much tighter than most headlights I've seen, which possibly helps keep water out of the dynamo. A small hole in the top of the bezel aligns with a very small pin in the top of the shell, and a spring clip at the bottom holds the lens assembly in place.

I was wrong about the red plastic band at the top acting as some sort of indicator - I ran the light with a power drill, and no light reaches the plastic, nor does the dynamo create sparks as I first thought it might (I guess that's motors, not small dynamos). I imagined the red plastic flashing with sparks in a aurora-like fashion, but it's purely decorative.

To provide power to a taillight, there's a wire entry hole at the bottom of the shell behind the drive mount, and a threaded wire attachment at the front of the dynamo (visible in photos #22 & #23).


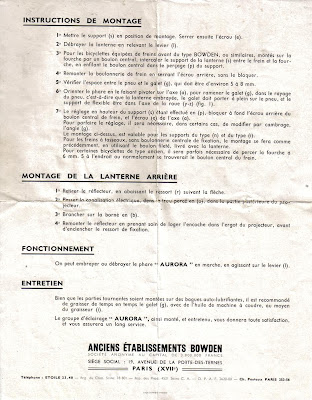







Monday, February 16, 2009

Grilled Phare Velox

Another fantastic grilled headlight on eBay-France, this time a "VELOX" with jeweled ornament, four-way switch, double bezels (one for the lens, one for the grill?).


Buy the Luxors, Feel the Luxors, Be the Luxors

Seeing life through the eyes of a Luxor twin-65's front rack...


Saturday, February 14, 2009

"We're in the Money"

Well, I spent last evening examining available information regarding the coming Economic Relief Package, and after doing a few quick calculations, it appears I will soon be bringing home an additional $12 per week.

I intend to spend it all on luxury items.

Wednesday, February 11, 2009

Long Campy Front QR Lever

Can anyone provide more information on the long Campagnolo front qr lever shown in the first photo? (A " normal" lever shown is in second photo.)


Tuesday, February 10, 2009

Yet Another Luxor Variation

Uh-oh, found another one, and this time it matches Le Fol's "La Paon" (peacock) pattern.


Adding Storage Capacity

Interesting combination from eBay France including nice rear rack, aluminum boxes, aluminum fenders, and aluminum Radios #18 headlight. The clip on the headlight is broken, but luckily I have a good condition replacement. Mostly I was after that rack and the tool boxes - they'll go on the Assenmacher.


Sunday, February 8, 2009

Aslux For A Dollar Twenty-Nine

I was a bit surprised to win this NOS Aslux light set for just 1 Euro. The aluminum headlight looks like it's about the same size as a Radios No.16 (about 50mm). The tombstone taillight looks like a copy of another Radios unit, and appears to have an indicator lens on top. I'll post better pics when it arrives.


Saturday, February 7, 2009

Knobbly Luxors Post Polish

Ah... that's better. After ten minutes each on the buffing wheel. And I was able to repair the damaged clasp on the headlight.


Turn Your Disk Wheel Into A Phonograph!

...actually, this 1936 French inventors' magazine includes instructions for converting a phonograph regulator into a bicycle speedometer.


Friday, February 6, 2009

Knobbly Luxors Arrive

Well, as luck would have it I was right about the "knobbly" Luxors - this is the only set of these I've seen (so far). The pattern consists of rows of raised square "tents" (pyramids?), larger at the front of the light and smaller at the tail, alternating with recessed lines tapering smaller at the tail. Note difference in the patterns on the headlight and taillight. The pattern on the taillight is less-well defined, and the tapered lines are different in composition. The clasp on the headlight is damaged and bent, and the square opening it fits into is also damaged and torn, but I think I can save it. The lens of the taillight is of the "concentric rings" pattern, very dirty with some scratches, but no fractures and should polish-up nicely. So what is this pattern called, and which mud guards does it match?